
Every language has a learning curve, and even though the CVU language is much simpler than using HTML and CSS, there is still new things to know. In order to make writing CVU easy we have create a web-based developer tool that comes with syntax highlighting and auto-complete for CVU so that you don't have to read the docs every time you want to write some code. Furthermore the Memri app automatically updates the view you are editing, every time you save it. Making it easy and quick to trial and error new look and feels for the view you are creating.
Installation
The Memri developer tool lives in the browser-application repository and must be installed separately in order to use it. Follow the following steps to get the developer tool installed on your system. Make sure you have git and npm installed.
$ git clone https://gitlab.memri.io/memri/browser-application.git
$ cd browser-application
$ npm install
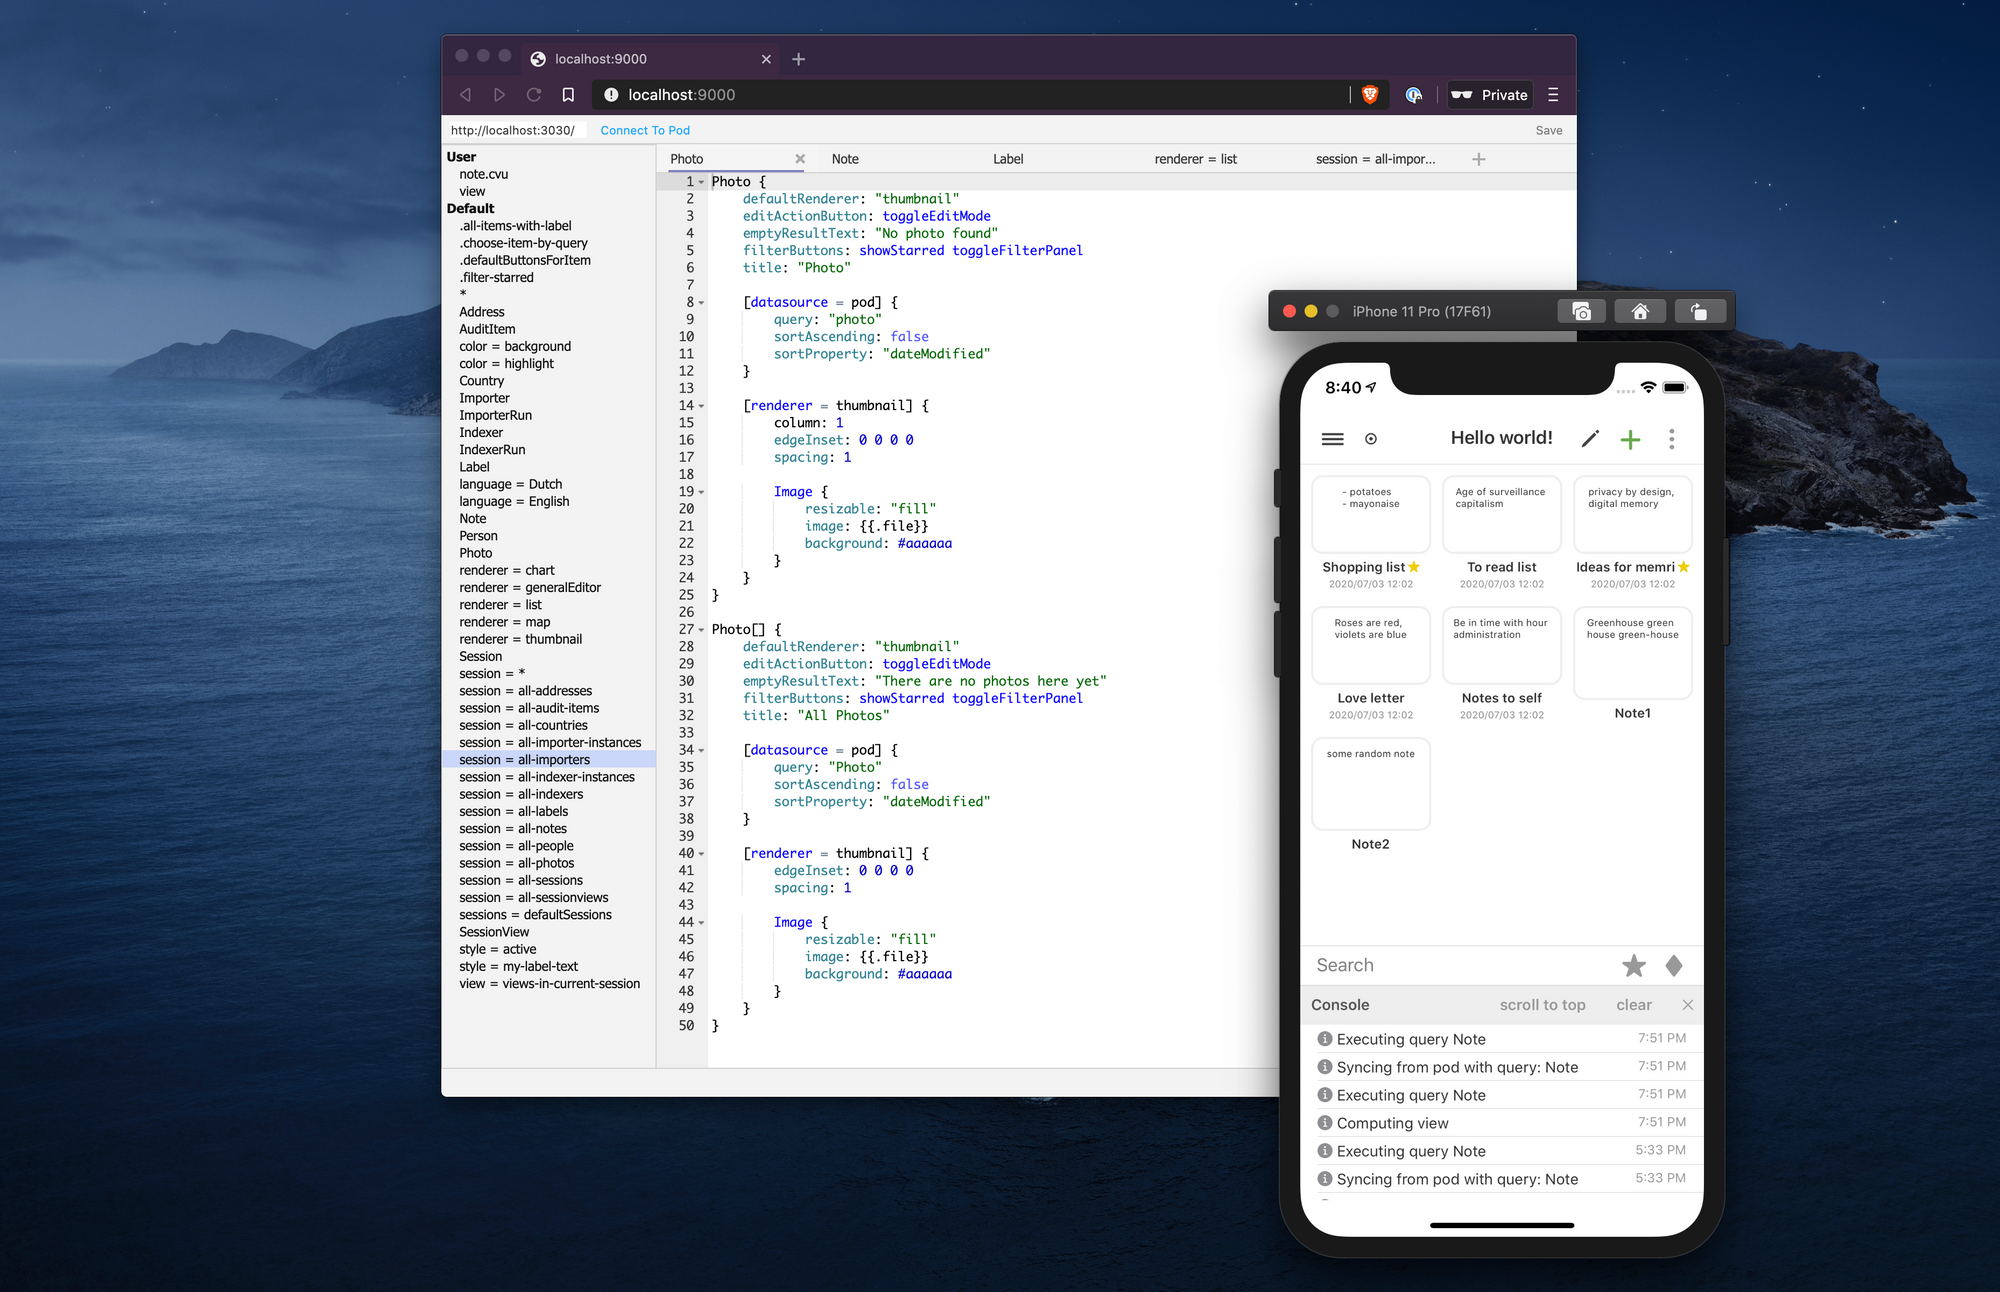
$ npm run startOpen http://localhost:9000 in your favorite browser (we recommend Brave) to open the developer tool. Make sure your pod is running and the memri app has connected at least once so that the default database is uploaded to your pod. Check out this tutorial if you still have to set everything up.
Customize a view
On the left you will see a list of CVU definitions. The definitions are grouped by selector. There are default CVU definitions that are read-only and can be opened to easily copy and paste instructions that you may wish to override. The user defined CVU files are editable.

In this example we'll alter how notes are displayed. If you are following along, open Memri in the simulator or on your phone and make sure it is connected to your running pod. Click the plus button to add a new CVU definition. Add a selector for a list of Note items like so:
Note[] {

}
Whenever you hit Cmd-S (or Ctrl-S) or press the save button in the top right corner the CVU definition is saved to your pod (you are asked to give it a name). If you have the list of notes open at that time, it will refresh and render taking into account the new CVU you have added.
We'll change the title and set the default renderer to thumbnail as a demonstration:
Note[] {
    title: "Hello world!"

    defaultRenderer: thumbnail
}
Now let's do something a bit more fun. Let's open the Note definition from the defaults and copy the selector that says [renderer = list] and paste it into our user defined cvu. It should look like this:

Let's customize this view. We all have personal tastes, and I like to have more notes displayed in one view so that I don't have to scroll so much. So let's move the date to the right top corner. I would also like the star to move to the right and use less padding and smaller fonts across the board. That's easy to change like this:

While editing I simply hit Cmd-S every time to see the changes so I could easily tweak it exactly the way I want it to look. Because these customizations cascade over the default CVUs (see more about cascading in the next article [TODO LINK]) I still get all the default functionality and can simply change what I need.
Remember CVU is not just for defining the looks, but also for interaction. It is possible to create a complete application by connecting different CVU views to each other. The developer tool is a great way to build small functionality in no time.
Debug console
As you are writing CVU, you will inadvertently make mistakes. The debug console that is built-in to the IOS app (and soon the browser based app) gives you immediate feedback on what's going on.

The debug console appears in the bottom of the screen when an error or warning occurs. It displays these warnings and errors in a list so that it's easy to get notified and resolve issues while writing your view. The console also displays informational notifications.
The image here on the right shows the console while rendering a Person. It tells us it queried a person based on their unique id (i.e. uid). However there are also two warnings. It seems we have made a spelling mistake in two places in our CVU definition. Those are easy to fix!
Schema browser
The last tool in the CVU toolbox is the schema browser, which you can browse online at schema.memri.io or run on your local machine. The schema browser lets you inspect the hierarchy of items, their properties and edges they can have.
Memri uses the term "item" for something in the knowledge graph (aka "node" or an "entity"). These items are connected to each other via "edges", or "relationships". Thus building a graph of interconnected knowledge about the world.
The schema browser works as a reference as you build your CVU. Note that you can add edges of any type to your item and are not restricted to the edge hierarchy. However we recommend submitting a merge request to update the schema in order for the memri search engine to be able to find things along the edges you want to use.

Check out the new Memri forum where all Memri engineers are active to answer questions and participate in discussions. You can find all the memri source code on the Memri gitlab.
Continue to learn about cascading views or pick a topic you want to dive in from the list below.